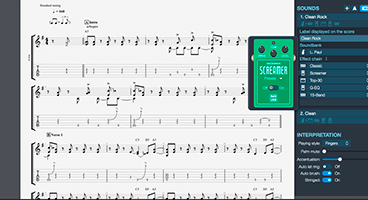
GProTab is the Guitar Pro software files sharing system. Here you can find tabs to learn how to play your most loved songs on a guitar. The chords can be viewed through our tab player, available for each tab on the project. You can download the available tabs by browsing through the inventory or by searching through the form above. You can also share your own tabs by clicking the "Share tab" in the main menu (requires registration).
Most popular tabs |
Most recent tabs |
As a new guitar player, you will need to learn how to effectively read the guitar Tab if you want to play chords, melodies, and songs. The process can get quite overwhelming, but thanks to this class, everything you need to know is well elaborated.
What's more, we are going to go the extra mile and go over the common elements you see when you pull up a tab.
To fully understand how to read Tabs, you will first need to be familiar with the 3 basic numbering systems.
Now, onto the basic layout of Tabs. Let's consider a Tab you want to learn. In most cases, you will notice some standard notation on the top and bottom of the Tab. You are also likely to see six horizontal lines of the Tab that will represent the six guitar strings.
The topmost line is the high E guitar string, and the bottom line will be the low E string of the guitar. In other words, the uppermost line will be the thinnest, and the bottom-most will be the thickest.
This brings us to our first Tab tip: Always read Tab from your left to your right. In case they are all stacked on top of the other, then that is the only time you can simultaneously play multiple notes.
I have mentioned notes and chords before. So what exactly are they, and do they do? The notes are the single numbers from your right to left on a piece of Tab that will represent a melody line or perhaps a solo you might play.
The chords are the stacked numbers on a piece of tablature. They will signify a harmony of some kind.
Having understood the basics of a Tab layout, it is time to look into the common elements you are likely to see when trying to play your favorite song.
Palm Muting: If you can see a P.M marker, that's the palm muting. For the little dashes, those are the number of times you should continue palm muting the notes.
Muted Notes: Also known as the dead notes, muted notes are symbolized by an "X" on a particular string. Every time you see a muted note, you are expected to soften the note using your right or left hand. In addition, you should play the note to completely mute the pitch. This often occurs in strumming patterns or raked parts of lead lines.
Bending: Whenever you see an arrow pointing upwards, you will be expected to bend a note. The upward-pointing arrow will be next to one or more numbers. Next to the shaft, you should see an indicator showing the distance you are to bend the note. It will also be essential to mention that the bend can be "full" or " ."
This brings us to our next tip, which is the bending tip: A full bend means bending up an entire step. In the same context, a half bend will require you to bend up half a step.
Sliding: remember a fret number we talked about earlier? The presentation of a fret number, a line, and another fret number will signify sliding. In most cases, depending on your sliding pitch, the line will be slanted up or down. That is to say: the line will be slanted up if you are sliding from a higher pitch and low if you are sliding from a lower pitch.
Hammer-ons and Pull-offs: you will use a little arc between two or more adjacent notes to identify hammer-ons and pull-offs. If this is a bit difficult for you to interpret, do not worry. It gets better the moment you start to familiarize yourself with a variety of musical scenarios. I'm pretty sure you will get the whole idea.
This brings us to our last tip: "Legato" is another word used to refer to hammer-ons and pull-offs.
Vibrato: When you repeatedly bend and release note over and over, we call that a vibrato. It is used for a powerful vocal effect. With a squiggly line over a note, you can tell the intensity of the vibrato. The thicker the squiggly line is, the more intense or wide the vibrato will be. The vice-versa is also true.
Downstrokes and Upstrokes: finally, on to the downstrokes and upstrokes.Take an author of a piece of music as an example. If the composer has a specific picking pattern, you are likely to see either a squared-off upside-down " U" or downward-facing arrow. These indicators represent the downstrokes and upstrokes, respectively. If the indicators are not included, then the player is usually free to experiment and try out his own picking patterns.
This takes us to the close of our session. As elaborated above, learning the Tab can be quite complicated, but I hope this class lifted some of the weight for you. From the class, it is also evident that practice will also come in handy to pick up all the concepts right. Otherwise, it will all just be a mystery to you. More importantly, remember to have fun and enjoy the process.